


今回はAutoCompleteを自作する第3回です。前の記事からの続きとなります。まだ見てない方はこちらから。
WEBシステムで入力フォームを作っている際に必ずと言ってもいいほど必要になるの「AutoComplete(Suggest)」の機能を自作していきます。Vue.jsの学習をしながら段階的にAutoCompleteの機能を作っていきます。
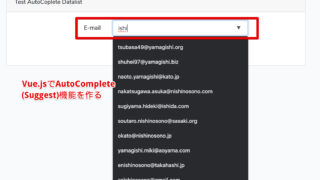
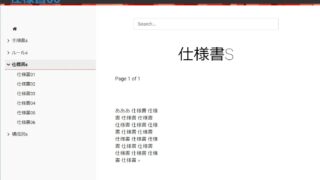
第3回の完成ページ
今回はサジェストした結果にマッチした文字を色つけして強調表示します。
第1回であった最終的なページと同じです。そちらに動画もあります。
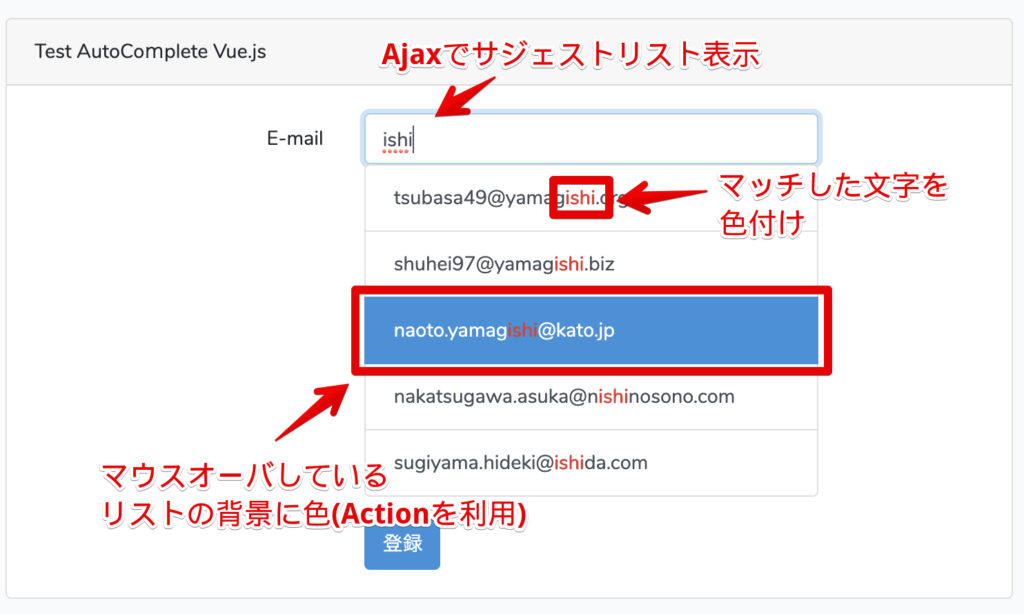
サジェストにマッチした文字の強調表示
AutoCompleteコンポーネントの修正
Vueコンポーネントの修正だけとなります。最終的なコードは以下となります。
resources/js/components/AutoCompleteComponent.vue
<template>
    <div>
        <input
            type="text"
            placeholder="what are you looking for?"
            v-model="query"
            class="form-control"
            autocomplete="off"
            name="email"
            @input="getSuggestionList"
            @change="change"
            @focus="open = true"
            @keydown.down="down"
            @keydown.up="up"
            @keydown.enter="enter"
        />
        <div class="panel-footer" v-if="results.length && open">
            <ul class="list-group">
                <li
                    v-for="(result, index) in results"
                    v-bind:key="result.index"
                    v-bind:class="{ active: index === current }"
                    class="list-group-item list-group-item-action"
                    @click="suggestionClick(index)"
                    @mouseover="mouseOver(index)"
                    v-html="stringMatchHighLight(result.email)"
                ></li>
            </ul>
        </div>
    </div>
</template>

<script>
export default {
    data: function() {
        return {
            query: "",
            results: [],
            open: false,
            current: 0
        };
    },

    methods: {
        getSuggestionList() {
            this.results = [];
            if (this.query.length >= 1) {
                axios
                    .get("/search/email", {
                        params: { query: this.query }
                    })
                    .then(Response => {
                        this.results = Response.data;
                        if (this.results) {
                            this.open = true;
                        }
                        console.log(this.results);
                    })
                    .catch(error => {
                        console.log(error);
                    });
            }
        },
        mouseOver: function(index) {
            this.current = index;
        },

        up() {
            if (this.current > 0) this.current--;
        },

        down() {
            if (this.current < this.results.length - 1) this.current++;
        },

        change() {
            if (this.open == false) {
                this.open = true;
                this.current = 0;
            }
        },

        enter() {
            if (this.results[this.current]) {
                this.query = this.results[this.current].email;
                this.results = this.results[this.current];
                this.open = false;
                this.current = 0;
            }
        },

        suggestionClick(index) {
            this.query = this.results[index].email;
            this.open = false;
            this.current = 0;
            this.results = this.results[index];
        },

        stringMatchHighLight(str) {
            if (!this.query) {
                return str;
            }
            return str.replace(
                this.query,
                '<span class="text-danger"><b>' + this.query + "</b></span>"
            );
        },
    }
};
</script>
動作確認
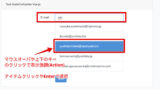
動作を確認してみましょう。npm run devを実施してからアクセスして下さい。
解説
それでは解説していきます。今回は結果にマッチした文字を色つけして強調表示するだけなので比較的簡単です。
まずサジェストされた結果を表示する際に、stringMatchHighLightメソッドを経由するようにしています。
stringMatchHighLightメソッドではreplace関数を利用してqueryにマッチした文字列を置き換えてます。HTMLとして表示するのでv-htmlを利用しています。
今回はtext-dangerと<b>でのボールド表示に置き換えてますが、自分の好きなスタイルに簡単に変更できます。
v-html="stringMatchHighLight(result[param])"

stringMatchHighLight(str) {
    if (!this.query) {
        return str;
    }
    return str.replace(
        this.query,
        '<span class="text-danger"><b>' + this.query + "</b></span>"
    );
},
第3回まとめ
今回はサジェストした結果にマッチした文字を色つけして強調表示する機能を追加しました。Vue.jsの機能というよりもJavascriptの機能となりますが、簡単に機能追加することができました。
サジェストした時にどの部分がマッチしているかが分かりやすくなってユーザビリティの向上に繋がりますね。
今回は以上となります。次回で最後です。

コメント