


前の記事でTableを操作するVueライブラリを比較してみました。

Vueのテーブルライブラリについて紹介されているページは幾つかあるのですが、実際に使い方などについて掲載されているページは少なめだったので、実際に検証した「vue-bootstrap4-table」についてLaravelとの連携のやり方について紹介します。
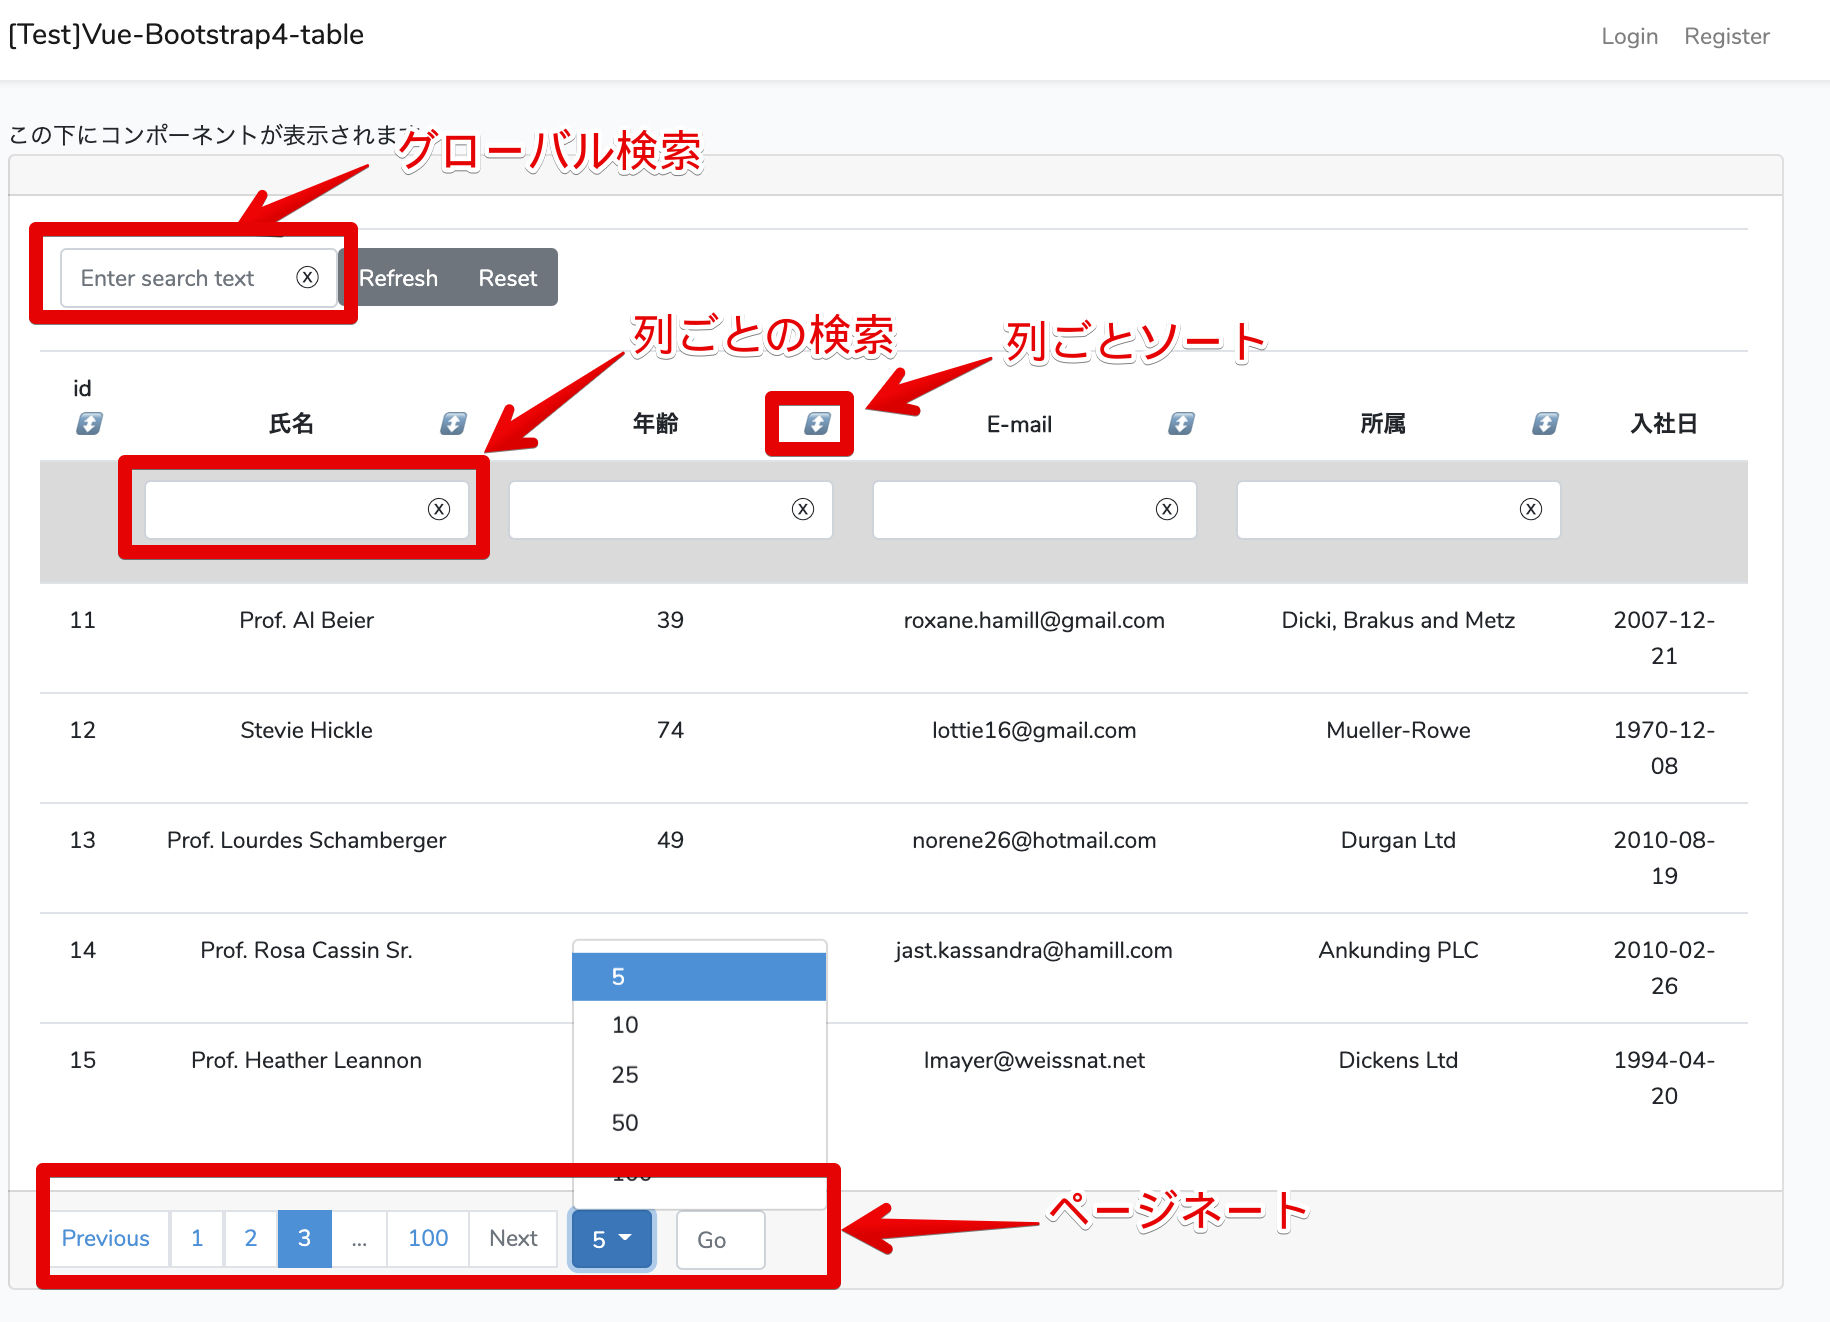
最終的なページ
テーブル操作をVueのライブラリで簡単に制御できるようなページを作成します。

前提
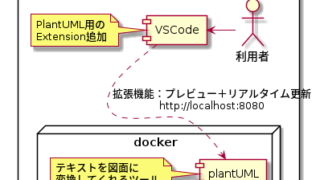
今回の環境は以下となります。今回は以下のDockerで環境を構築しました。ですが、普通にLaravelでVue.jsが有効の環境があれば同じ手順で構築できます。
| ホストOS | MacOS Catalina 10.15.3 |
| Docker for Mac | Engine 19.03.5 Compose 1.25.4 |
| Laravel | # php artisan -V Laravel Framework 6.17.1 |
| Vue.js | # npm list vue vue@2.6.11 |
| NPM | # npm -v 3.10.10 |
| PHP | # php -v PHP 7.4.2 (cli) (built: Jan 21 2020 11:35:20) ( NTS ) |
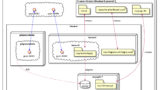
作成したコンテナは以下のようになってます。(私の環境は他のコンテナでポートを使っていてめちゃめちゃなので、普通に80とか8080使ってください)
$ docker-compose ps
              Name                             Command               State                 Ports
---------------------------------------------------------------------------------------------------------------
vue_bootstrap4_table                /usr/sbin/httpd -D FOREGROUND    Up      0.0.0.0:8001->80/tcp
vue_bootstrap4_table_mysql_1        docker-entrypoint.sh mysqld      Up      0.0.0.0:33001->3306/tcp, 33060/tcp
vue_bootstrap4_table_phpmyadmin_1   /docker-entrypoint.sh apac ...   Up      0.0.0.0:8002->80/tcp
Laravelの言語と時刻の設定
最初にLaravelの言語と時刻の設定を変更します。
config/app.phpの以下の部分を修正します。
    'timezone' => 'Asia/Tokyo',
    'locale' => 'ja',
    'fallback_locale' => 'ja',
    'faker_locale' => 'ja_JP', //<- もしこのあとのダミーデータを日本語で作成したければ変更
データ準備(Migrate)
今回は例として社員情報テーブルを想定して、employeesテーブルを作成して検証します。
また、テーブルを作成しただけでは、検証ができないので初期のダミーデータをFactoryとSeederを利用して作ってます。
まずはコンテナへ接続したらLaravel Projectフォルダへ移動して下さい。
Migration作成
まずはMigration用のファイルを作成します。
# php artisan make:migration create_employees_table
Created Migration: 2020_03_02_225321_create_employees_table
ファイルを以下のように修正します。今回はあくまで検証のためということでこれくらいの項目数で作ることにしてます。
    public function up()
    {
        Schema::create('employees', function (Blueprint $table) {
            $table->bigIncrements('id');
            $table->string('employee_id')->nullable(); // 社員番号
            $table->string('name')->nullable(); // 氏名
            $table->integer('year')->nullable(); // 年齢
            $table->string('email')->nullable(); // E-mail
            $table->string('dept')->nullable(); // 所属部門
            $table->date('start_day')->nullable();
            $table->timestamps();
        });
}確認のため、migrate:refreshを行って、テーブル作成が成功することを確認します。
# php artisan migrate:refresh
Rolling back: 2019_08_19_000000_create_failed_jobs_table
Rolled back:  2019_08_19_000000_create_failed_jobs_table (0.16 seconds)
Rolling back: 2014_10_12_100000_create_password_resets_table
Rolled back:  2014_10_12_100000_create_password_resets_table (0.04 seconds)
Rolling back: 2014_10_12_000000_create_users_table
Rolled back:  2014_10_12_000000_create_users_table (0.03 seconds)
Migrating: 2014_10_12_000000_create_users_table
Migrated:  2014_10_12_000000_create_users_table (0.13 seconds)
Migrating: 2014_10_12_100000_create_password_resets_table
Migrated:  2014_10_12_100000_create_password_resets_table (0.07 seconds)
Migrating: 2019_08_19_000000_create_failed_jobs_table
Migrated:  2019_08_19_000000_create_failed_jobs_table (0.04 seconds)
Migrating: 2020_03_02_225321_create_employees_table
Migrated:  2020_03_02_225321_create_employees_table (0.05 seconds)
データ準備(ダミーデータの登録)
employeesテーブル作成ができましたので、次に実際のサンプルとしてのダミーデータを作成します。まずはデータを追加するためのEmployeeモデルを作成します。
Model作成
# php artisan make:model EmployeeFactory作成
次にFactoryファイルを作成します。これはダミーデータを生成するためのものです。
# php artisan make:factory EmployeeFactorydatabase/factories/EmployeeFactory.phpを編集します
<?php

/** @var \Illuminate\Database\Eloquent\Factory $factory */

use App\Employee;
use Faker\Generator as Faker;

$factory->define(App\Employee::class, function (Faker $faker) {
    return [
      'name' => $faker->name,
      'year' => $faker->numberBetween($min = 10, $max = 99),
      'email' => $faker->email,
      'dept' => $faker->company,
      'start_day' => $faker->dateTime($max = 'now', $timezone = date_default_timezone_get()),
    ];
});
Seeder作成
Seederファイルを作成します。これは先ほどのFactoryで作成したダミーデータを登録するためのものです。
# php artisan make:seed EmployeesTableSeeder「database/seeds/EmployeesTableSeeder.php」を編集します。今回はテーブル操作をするためにそこそこデータ量が欲しいので500件登録します。
<?php

use Illuminate\Database\Seeder;

class EmployeesTableSeeder extends Seeder
{
    /**
     * Run the database seeds.
     *
     * @return void
     */
    public function run()
    {
        factory(App\Employee::class, 500)->create();
    }
}
最後にSeederをまとめている「database/seeds/DatabaseSeeder.php」に登録します。
<?php

use Illuminate\Database\Seeder;

class DatabaseSeeder extends Seeder
{
    /**
     * Seed the application's database.
     *
     * @return void
     */
    public function run()
    {
        $this->call(EmployeesTableSeeder::class);
    }
}
Seederの実行+ダミーデータ確認
実際にSeederを実行し、ダミーデータが500件登録されることを確認します。
# php artisan db:seed
Seeding: EmployeesTableSeeder
Seeded:  EmployeesTableSeeder (1.6 seconds)
Database seeding completed successfully.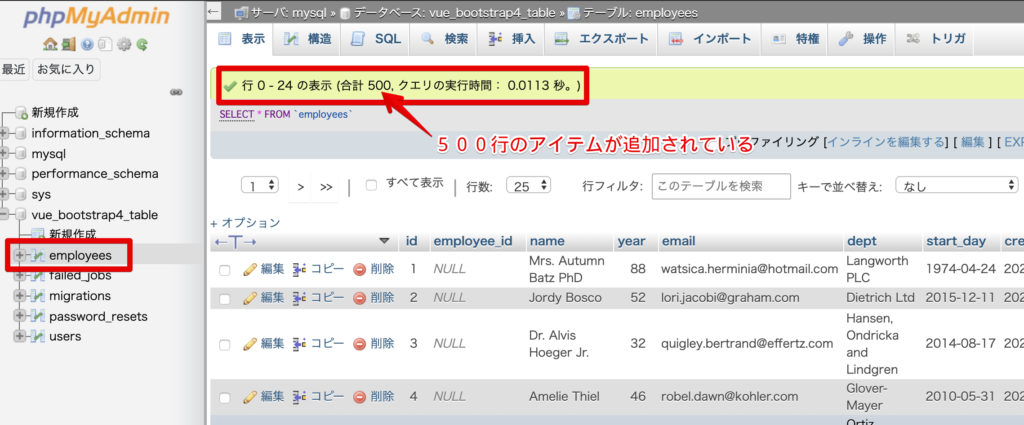
補足:Migrate:refreshとSeederを同時する場合には以下でできます。
# php artisan migrate:refresh --seedと、いうことでまずはここまででデータの準備が完了です!
vue-bootstrap4-tableのインストール
初期データの準備が終わったら、npmコマンドでvue-bootstrap4-tableをインストールします。
# npm install vue-bootstrap4-table --save.envファイル修正
他のアプリと見分けやすいためにタイトルだけ修正します。(無理して変更しなくてもOK)
APP_NAME=[Test]Vue-Bootstrap4-tableルーティング修正
/routes/web.php に以下を追加します。
/employeeへアクセスした際にこの後作成するEmpoyeeコントローラのindexメソッドへ処理を投げます。
合わせて/api/employeesへアクセスすることでemployeesの全データをpagenateの値で返すようにします。<-ここ重要です。
routes/web.php
// ↓追加
use App\Employee;

Route::get('/', function () {
    return view('welcome');
});
Auth::routes();
Route::get('/home', 'HomeController@index')->name('home');

// ↓追加
Route::get('/emp', 'EmployeeController@index')->name('emp');
Route::get('/api/employees', function () {
    $employees = Employee::all()->count();
    return App\Employee::paginate($employees);
});
コントローラー作成
コントローラを作成します。
# php artisan make:controller --resource EmployeeController 以下のように修正します。empのビューを返すようにしているだけです。
    public function index()
    {
        return view('emp');
    }
ビューの作成
次にビューを作成します。ビューの作成にはコマンドがないので手で以下のファイルを作成します。
resources/views/emp.blade.php
@extends('layouts.app')

@section('content')
<div class="container">
    この下にコンポーネントが表示されます
    <vue-bootstrap4-table />
</div>
@endsection
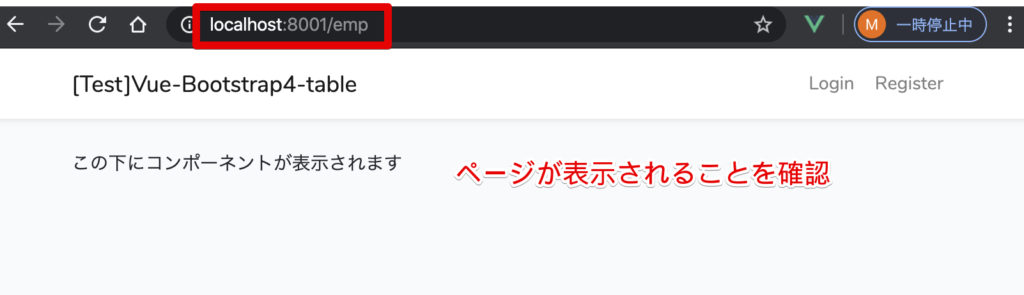
念のため、ページが開けることを確認します。
Vueの設定
次にいよいよVue側の設定を行います。
Vue Componentファイルの作成
resources/js/components/VueBootstrap4Table.vueのファイルを新規で作成して以下のように修正します。
基本的な利用方法は以下の公式ドキュメントを参考にしました。実際に設定できる値については公式を確認してください。なお、今回はサーバモードは使わずにクライアントモードで利用しています。
https://github.com/rubanraj54/vue-bootstrap4-table
<template>
    <vue-bootstrap4-table
        :rows="rows"
        :columns="columns"
        :config="config"
        :actions="actions"
        @on-change-query="onChangeQuery"
        :total-rows="total_rows"
    >
        <template slot="sort-asc-icon">
            <i class="fa fa-sort-up">↑</i>
        </template>
        <template slot="sort-desc-icon">
            <i class="fa fa-sort-down">↓</i>
        </template>
        <template slot="no-sort-icon">
            <i class="fa fa-sort">↕️</i>
        </template>
        <template slot="paginataion-previous-button">
            Previous
        </template>
        <template slot="paginataion-next-button">
            Next
        </template>

        <template slot="refresh-button-text">
            Refresh
        </template>
        <template slot="reset-button-text">
            Reset
        </template>
    </vue-bootstrap4-table>
</template>

<script>
import axios from "axios";
import VueBootstrap4Table from "vue-bootstrap4-table";
export default {
    name: "App",
    data: function() {
        return {
            rows: [],

            columns: [
                {
                    label: "id",
                    name: "id",
                    sort: true
                },
                {
                    label: "氏名",
                    name: "name",
                    sort: true,
                    filter: {
                        type: "simple"
                    }
                },
                {
                    label: "年齢",
                    name: "year",
                    sort: true,
                    filter: {
                        type: "simple"
                    }
                },
                {
                    label: "E-mail",
                    name: "email",
                    sort: true,
                    filter: {
                        type: "simple"
                    }
                },
                {
                    label: "所属",
                    name: "dept",
                    sort: true,
                    filter: {
                        type: "simple"
                    }
                },
                {
                    label: "入社日",
                    name: "start_day"
                }
            ],
            actions: [],

            classes: {
                tableWrapper: "outer-table-div-class wrapper-class-two",
                table: {
                    "table-striped my-class": true,
                    "table-bordered my-class-two": function(rows) {
                        return true;
                    }
                },
                row: {
                    "my-row my-row2": true,
                    "function-class": function(row) {
                        return row.id == 1;
                    }
                },
                cell: {
                    "my-cell my-cell2": true,
                    "text-danger": function(row, column, cellValue) {
                        return column.name == "year" && row.year > 50;
                    }
                }
            },

            config: {
                server_mode: false,
                pagination: true, // default true
                pagination_info: false, // default true
                num_of_visibile_pagination_buttons: 5, // default 5
                per_page: 5, // default 10
                per_page_options: [5, 10, 25, 50, 100],
                preservePageOnDataChange: false // default false <- 検索したときにいたページを維持するか/しないか
            },
            queryParams: {
                sort: [],
                filters: [],
                global_search: "",
                per_page: 10,
                page: 1
            },
            total_rows: 0
        };
    },
    methods: {
        onChangeQuery(queryParams) {
            this.queryParams = queryParams;
            console.log(this.queryParams);
            this.fetchData();
        },

        fetchData() {
            let self = this;
            axios
                .get("http://localhost:8001/api/employees", {
                    params: {
                        queryParams: this.queryParams
                    }
                })
                .then(function(response) {
                    console.log(response.data.data);
                    self.rows = response.data.data;
                    self.total_rows = response.data.total;
                })
                .catch(function(error) {
                    console.log(error);
                });
        }
    },
    components: {
        VueBootstrap4Table
    },
    mounted() {
        this.fetchData();
    }
};
</script>
<style></style>
app.jsの修正
「resources/js/app.js」に先ほど作ったVue Componentを登録します。元々あったexsample-componentの下にvue-bootstrap4-tableを追加します。
Vue.component('example-component', require('./components/ExampleComponent.vue').default);
Vue.component('vue-bootstrap4-table', require('./components/VueBootstrap4Table.vue').default);
動作確認
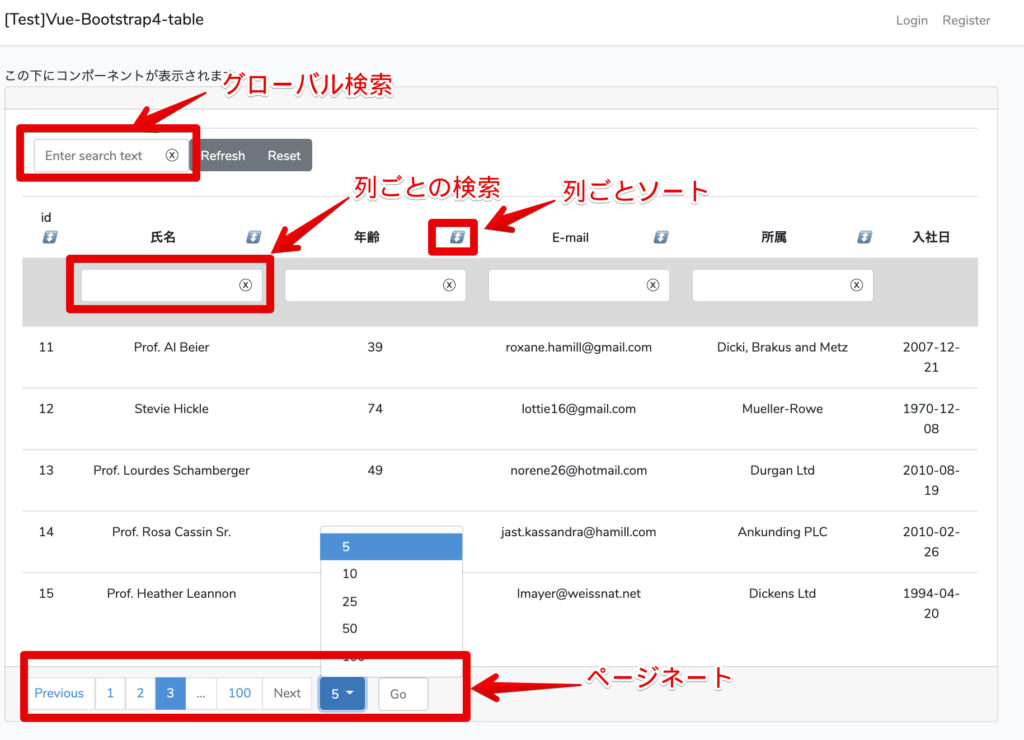
修正したら再度コンパイルしてページ動作を確認してみます。
# npm run devページが以下のように表示されることを確認します。グローバル検索や、ソートや列ごとの検索、ページネートなどが利用できることができます。
FontAwesomeがインストールされていれば、アイコンも表示されるはずです。VueBootstrap4Table.vue内で記載されている部分を適宜変更して見てください。
まとめ
今回検証した「vue-bootstrap4-table」を使うことで簡単にテーブル操作をすることができました。
テーブル操作の処理をLaravel側で実装しようとすると、検索機能を実装するだけでもかなりの時間がかかる作業になりますが、Vue.jsのライブラリに操作を任せれることで、時間がを大幅に短縮することができますね!!
今回のリポジトリについては一応以下に上げておきます。
以上となります。

コメント