


購入した書籍「インフラCI実践ガイド」を試した際のメモの続きです。
第9章の「より品質の高い成果物を作る」です。第9章も長めなので前半、後半の2回に分けていきます。
システムテストを行う演習を通じて、運用に関連するノウハウを習得していくという内容ですが、かなり難易度が高めの内容になっていると思います。
これをすんなり理解できればインフラCIを理解したといってもいいのではないでしょうか。


9.1 成果物の品質を高める
成果物の品質を高めていくための方法を2つ紹介します。
①システムテストをパイプラインに組み込むことで多角的な視点からテストを実施して品質そのものを高める方法
②品質が確保されたイメージを成果物とし、環境間で再利用することによって環境間のズレを最小限に抑える方法
9.1.1 システムテストのパイプラインへの組み込み
品質をさらに向上させるには仕様の確認だけでは不十分です。
例えば、サービスのアクセス負荷に耐えられなくなることや、セキュリティが脆弱で不正侵入を許してしまうといった、非機能要求を考慮したテストが必要となります。
9.1.2 イメージ化した成果物を再利用する
すでにテストが施されたインフラリソースをイメージ化し、環境間で再利用する方法もあります。
ここでいうイメージ化はユニットテストやシステムテストまで完了して「あるべき状態」となった仮想イメージやDockerfileを利用してビルドしたコンテナイメージを指します。
9.2 パイプラインでシステムのあるべき状態を確認する
システムテストを行うためには、まずは「システムのあるべき状態」を定義して定量化しておかなければいけません。
演習では例として、「Ketchupのログインページ(/admin/login)に対する参照系のスループットが、サーバー1台あたり100req/s(request/sec)を上回っていること」を定義します。
9.2.1 インフラCIとシステムテストの関係
定量化されて機械的に判断できるものであれば、システムテストをパイプラインに組み込むことができます。
それによって、これまで以上に多角的にテストされた成果物を作成することにつながります。
9.2.2 負荷テストの目的を決める
Ketchupのアクセスするためには何を定量化すればよいのでしょうか。以下のようなものがあげられます。
- 性能検証:一定時間の処理件数を示すスループットや、リクエストの応答時間示すスループットや、リクエストの応答時間などを定義し、その値を負荷テストで上回るかを確認する
- 限界超過検証:処理限界を超える状態におけるシステムの挙動を確認する。もしくは、処理限界値そのものを確認する
- 耐久性検証:システムの高負荷状態が長時間続いた場合の挙動を確認する
9.2.3 Locustを用いた負荷テストを実装する
Locustとは
「Locust」はpython製の負荷テストツールです。以下のような特徴があります。
- Pythonコードでのシナリオテスト記載
- スケーラブル
- コマンドラインツールの提供
- WebベースのUI提供
- 軽量
Locustの導入
Locustの導入方法も含め、コンテナイメージを作ってGitlabのコンテナレジストリに登録して利用してみましょう。
コンテナレジストリを用意しておくことで、どの環境でパイプラインを実行しても同様のテスト環境を再現できます。
演習ではgitlab-runnerサーバー上でイメージを作成します。
[root@infraci ~]# cd ~/vagrant/infraci/
[root@infraci infraci]# vagrant ssh gitlab-runner
[vagrant@gitlab-runner ~]$ sudo -i
[root@gitlab-runner ~]# git clone http://192.168.33.10/root/ketchup-vagrant-ans                                                                                                                  ble.git
[root@gitlab-runner ~]# cd ./ketchup-vagrant-ansible/flexible_artifacts/locust/

[root@gitlab-runner locust]# docker run --rm -i hadolint/hadolint hadolint - < Dockerfile
Unable to find image 'hadolint/hadolint:latest' locally
latest: Pulling from hadolint/hadolint
df20fa9351a1: Already exists
e82f5c3316e1: Pull complete
Digest: sha256:e0f960b5acf09ccbf092ec1e8f250cd6b5c9a586a0e9783c53618d76590b6aec
Status: Downloaded newer image for hadolint/hadolint:latest
書籍に従っていきます。エラーが出たので対応してます(下記参照)
[root@gitlab-runner locust]# docker build --force-rm=true -t \
> 192.168.33.10:4567/root/ketchup-vagrant-ansible/locust:devel .
(省略)
 ---> 42365e88e77a
Successfully built 42365e88e77a
Successfully tagged 192.168.33.10:4567/root/ketchup-vagrant-ansible/locust:devel

[root@gitlab-runner locust]# docker images
REPOSITORY                                                   TAG                 IMAGE ID            CREATED             SIZE
192.168.33.10:4567/root/ketchup-vagrant-ansible/locust       devel               42365e88e77a        2 minutes ago       536MB

[root@gitlab-runner locust]# docker run --rm 192.168.33.10:4567/root/ketchup-vagrant-ansible/locust:devel locust --version
[2020-06-30 07:22:02,686] 23e56e57ae0d/INFO/stdout: Locust 0.8
[2020-06-30 07:22:02,688] 23e56e57ae0d/INFO/stdout:
演習の通りに実施していたところ、dockerのbuildしたときに以下のエラーが出て失敗してしまいました。どうもansibleのバージョンがインストールできなかったようです。
Complete!
Loaded plugins: fastestmirror, ovl
Loading mirror speeds from cached hostfile
 * base: mirrors.cat.net
 * epel: nrt.edge.kernel.org
 * extras: mirrors.cat.net
 * updates: mirrors.cat.net
No package ansible-2.4.2.0 available.
Error: Nothing to do
Removing intermediate container 5bc270564718
The command '/bin/sh -c export LANG=C;     rpm --import /etc/pki/rpm-gpg/RPM-GPG-KEY-CentOS-7;     yum install -y epel-release &&     yum install -y git &&     yum install -y "ansible-${ANSIBLE_VERSION:?}" &&     yum install -y "ansible-lint-${LINT_VERSION:?}" &&     yum install -y python2-pip gcc-c++ &&     yum clean all' returned a non-zero code: 1
[root@gitlab-runner locust]# docker run --rm -i hadolint/hadolint hadolint - < Dockerfile
そのため。Dockerファイルを一部いじって対応しました。
おそらく書籍が発売された2018年5月とは少し環境が変わってきているようですね。
当然です。時代は変わっているのです。
FROM centos:7
ENV container docker

#ENV ANSIBLE_VERSION 2.4.2 <-コメントアウト
ENV LINT_VERSION 3.5.1
ENV LOCUST_VERSION 0.8
ENV PYZMQ_VERSION 15.2.0
ENV GEVENT_VERSION 1.3.1

COPY locustfile.py locustfile.py

RUN export LANG=C; \
    rpm --import /etc/pki/rpm-gpg/RPM-GPG-KEY-CentOS-7; \
    yum install -y epel-release && \
    yum install -y git && \
    yum install -y "ansible" && \ " <- Version指定しないように修正
    yum install -y "ansible-lint-${LINT_VERSION:?}" && \
    yum install -y python2-pip gcc-c++ && \
    yum clean all

RUN pip install --disable-pip-version-check locustio=="${LOCUST_VERSION}" pyzmq=="${PYZMQ_VERSION}" gevent=="${GEVENT_VERSION}"続けてパイプライン上で利用できるように、Gitlabのコンテナレジストリに作成したコンテナイメージを登録しておきます。
やっていることはGitlab Container Registryにログインして、Gitlab Container Registryに登録しているようです。
ここら辺は私もまだ理解できていない部分です。
[root@gitlab-runner ~]# docker login 192.168.33.10:4567
Username: root
Password:
Login Succeeded
[root@gitlab-runner ~]# docker push 192.168.33.10:4567/root/ketchup-vagrant-ansible/locust
テストケース作成
Locustのテストケースは-fオプションでファイルで渡すか、locustfile.pyという名前で、実行時のカレントディレクトリに保存しておけば、動的にファイルを読み込まれます。
計測を手動で実施
テストを自動化してCIのパイプライン上で機械的に行うためには、コマンドラインからテストを実行できることが重要な条件です。
テストを用意して接続を確認します(割愛します)
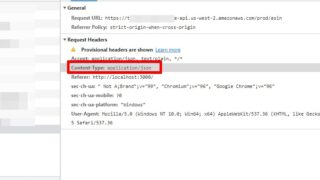
[root@gitlab-runner ~]# docker run --rm -it 192.168.33.10:4567/root/ketchup-vagrant-ansible/locust:devel curl -I http://192.168.33.15/admin
HTTP/1.1 301 Moved Permanently
Server: nginx/1.16.1
Date: Wed, 08 Jul 2020 03:37:41 GMT
Content-Type: text/plain; charset=utf-8
Connection: keep-alive
Location: /admin/
ここでも書籍の通りに実施していたらエラーになってしまいました。どうも-tオプションはないといわれます。調べて代わりになりそうな-nで実施してみました。
似たような値ですが、取れてるようです。(対象した内容は下記Check参照)
[root@gitlab-runner ~]# docker run --rm -it 192.168.33.10:4567/root/ketchup-vagrant-ansible/locust:devel locust -H http://192.168.33.15 -f ./locustfile.py --no-web --only-summary -c 10 -r 5 -t 10s
Usage: locust [options] [LocustClass [LocustClass2 ... ]]

locust: error: no such option: -t


[root@gitlab-runner ~]# docker run --rm -it 192.168.33.10:4567/root/ketchup-vagrant-ansible/locust:devel locust -H http://192.168.33.15 -f ./locustfile.py --no-web --only-summary  -c 10 -r 5 -n 100
[2020-06-30 09:19:58,460] 4ed298e3e776/INFO/locust.main: Starting Locust 0.8
[2020-06-30 09:19:58,504] 4ed298e3e776/INFO/locust.runners: Hatching and swarming 10 clients at the rate 5 clients/s...
[2020-06-30 09:20:00,641] 4ed298e3e776/INFO/locust.runners: All locusts hatched: WebsiteUser: 10
[2020-06-30 09:20:00,644] 4ed298e3e776/INFO/locust.runners: Resetting stats

[2020-06-30 09:20:10,434] 4ed298e3e776/INFO/locust.runners: All locusts dead

[2020-06-30 09:20:10,441] 4ed298e3e776/INFO/locust.main: Shutting down (exit code 0), bye.
 Name                                                          # reqs      # fails     Avg     Min     Max  |  Median   req/s
--------------------------------------------------------------------------------------------------------------------------------------------
 GET /admin/login                                                 109     0(0.00%)     107      32     255  |      97   10.25
--------------------------------------------------------------------------------------------------------------------------------------------
 Total                                                            109     0(0.00%)                                      10.25

Percentage of the requests completed within given times
 Name                                                           # reqs    50%    66%    75%    80%    90%    95%    98%    99%   100%
--------------------------------------------------------------------------------------------------------------------------------------------
 GET /admin/login                                                  109     97    120    120    130    170    190    210    220    255
--------------------------------------------------------------------------------------------------------------------------------------------
オプション一覧を表示してみましたが「-t」オプションは実装されてないみたいですね。とりあえずは代わりに「-n NUM_REQUESTS」オプションを使うとよいみたいのでそれにします。
環境は毎日変わっていくのです。
[root@gitlab-runner ~]# docker run --rm -it 192.168.33.10:4567/root/ketchup-vagrant-ansible/locust:devel locust --help
Usage: locust [options] [LocustClass [LocustClass2 ... ]]

Options:
  -h, --help            show this help message and exit
  -H HOST, --host=HOST  Host to load test in the following format:
                        http://10.21.32.33
  --web-host=WEB_HOST   Host to bind the web interface to. Defaults to '' (all
                        interfaces)
  -P PORT, --port=PORT, --web-port=PORT
                        Port on which to run web host
  -f LOCUSTFILE, --locustfile=LOCUSTFILE
                        Python module file to import, e.g. '../other.py'.
                        Default: locustfile
  --csv=CSVFILEBASE, --csv-base-name=CSVFILEBASE
                        Store current request stats to files in CSV format.
  --master              Set locust to run in distributed mode with this
                        process as master
  --slave               Set locust to run in distributed mode with this
                        process as slave
  --master-host=MASTER_HOST
                        Host or IP address of locust master for distributed
                        load testing. Only used when running with --slave.
                        Defaults to 127.0.0.1.
  --master-port=MASTER_PORT
                        The port to connect to that is used by the locust
                        master for distributed load testing. Only used when
                        running with --slave. Defaults to 5557. Note that
                        slaves will also connect to the master node on this
                        port + 1.
  --master-bind-host=MASTER_BIND_HOST
                        Interfaces (hostname, ip) that locust master should
                        bind to. Only used when running with --master.
                        Defaults to * (all available interfaces).
  --master-bind-port=MASTER_BIND_PORT
                        Port that locust master should bind to. Only used when
                        running with --master. Defaults to 5557. Note that
                        Locust will also use this port + 1, so by default the
                        master node will bind to 5557 and 5558.
  --expect-slaves=EXPECT_SLAVES
                        How many slaves master should expect to connect before
                        starting the test (only when --no-web used).
  --no-web              Disable the web interface, and instead start running
                        the test immediately. Requires -c and -r to be
                        specified.
  -c NUM_CLIENTS, --clients=NUM_CLIENTS
                        Number of concurrent clients. Only used together with
                        --no-web
  -r HATCH_RATE, --hatch-rate=HATCH_RATE
                        The rate per second in which clients are spawned. Only
                        used together with --no-web
  -n NUM_REQUESTS, --num-request=NUM_REQUESTS
                        Number of requests to perform. Only used together with
                        --no-web
  -L LOGLEVEL, --loglevel=LOGLEVEL
                        Choose between DEBUG/INFO/WARNING/ERROR/CRITICAL.
                        Default is INFO.
  --logfile=LOGFILE     Path to log file. If not set, log will go to
                        stdout/stderr
  --print-stats         Print stats in the console
  --only-summary        Only print the summary stats
  --no-reset-stats      Do not reset statistics once hatching has been
                        completed
  -l, --list            Show list of possible locust classes and exit
  --show-task-ratio     print table of the locust classes' task execution
                        ratio
  --show-task-ratio-json
                        print json data of the locust classes' task execution
                        ratio
  -V, --version         show program's version number and exit
ketchupの性能限界を知る
少しずつ負荷を挙げていって私の環境での性能限界を確認しました。
書籍では同時接続160くらいからピークとなっていましたが、私の環境では同時接続15くらいが限界のようです(;’∀’)
実際に取得した結果は以下のようになりました。
| 同時接続数(-c) | クライアント生成数(-r) | リクエスト数(-n) | 結果(req/s) |
| 10 | 50 | 100 | 10.00 |
| 15 | 50 | 100 | 15.40 |
| 20 | 50 | 100 | 17.50 |
| 25 | 50 | 100 | 19.67 |
| 30 | 50 | 100 | 22.5 |
| 35 | 50 | 100 | 19.00 |
| 40 | 50 | 100 | 29.33 |
9.2.4 システムテストをパイプラインへ組み込む
先ほどの取得した指標から以下の条件で私の環境に合わせてシステムテストへ組み込みます。
「同時接続:15、クライアント生成数:50、リクエスト数100の結果が15req/s以上であること」
システムテスト用のPlaybookを用意します。自分の環境に合わせてます。あと先ほどと同様に-tオプションの代わりに-nオプションへ変更してます。
[root@infraci infraci]# cd ~/ketchup-vagrant-ansible/
[root@infraci ketchup-vagrant-ansible]# vim flexible_artifacts/sys_test_locust.yml
- hosts: localhost
  connection: local
  gather_facts: false

  vars:
    LC_NUM_CLIENTS: 15
    LC_HATCH_RATE: 50
    LC_RUN_TIME: 100

  tasks:
    - name: Performance test to ketchup_nginx
      command: |-
        locust -f ./locust/locustfile.py -H http://{{ ketchup_nginx_host }} \
               --no-web --only-summary --logfile=/var/log/locust.log --csv=sys_test \
               -c "{{ LC_NUM_CLIENTS }}" -r "{{ LC_HATCH_RATE }}" -n "{{ LC_RUN_TIME }}"
システムテストのジョブを作成する
事前に用意されているジョブファイルの内容を確認してから置き換えてます。
[root@infraci infraci]# cd ~/ketchup-vagrant-ansible/
[root@infraci ketchup-vagrant-ansible]# vim flexible_artifacts/sys_test_locust.yml
[root@infraci ketchup-vagrant-ansible]# mv -v .gitlab-ci.yml .gitlab-ci_locust.yml
`.gitlab-ci.yml' -> `.gitlab-ci_locust.yml'
[root@infraci ketchup-vagrant-ansible]# cp -vi ./flexible_artifacts/.gitlab-ci_locust.yml .gitlab-ci.yml
`./flexible_artifacts/.gitlab-ci_locust.yml' -> `.gitlab-ci.yml'
[root@infraci ketchup-vagrant-ansible]# git add .gitlab-ci.yml flexible_artifacts/sys_test_locust.yml
[root@infraci ketchup-vagrant-ansible]# git commit -m "ketchup performance test practice"
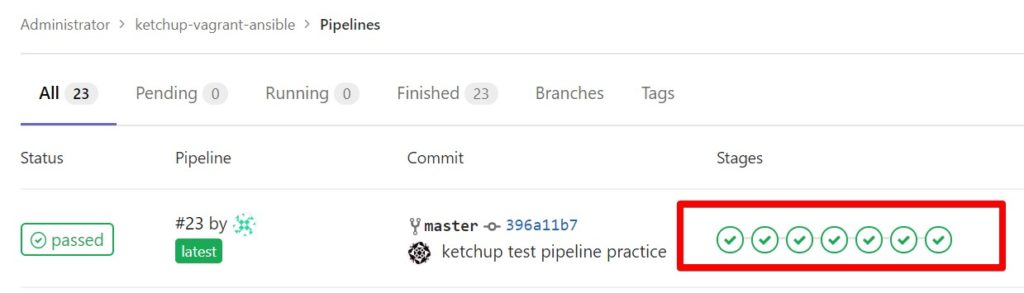
[root@infraci ketchup-vagrant-ansible]# git pushそうするとシステムテストのパイプラインが走ります。
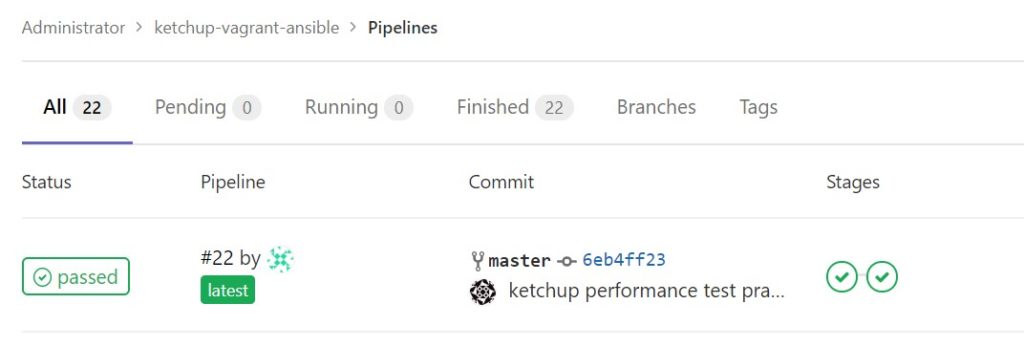
ジョブの結果を確認してパフォーマンスのチェックがされていることを確認します。うまく条件をパスできていることを確認できました。

テストの結果を出力する
複数のテスト結果から期待値を適切に割り出したい場合があります。
artifactオプションを利用することでジョブが終了するタイミングで指定したファイルをGitlab上に一定期間保管してくれます。
.gitlab-ci.ymlに記載されている内容を確認します。
artifacts:
name: "$CI_JOB_STAGE-$CI_COMMIT_REF_NAME"
paths:
- ./flexible_artifacts/sys_test*.log
- ./flexible_artifacts/sys_test*.csv
expire_in: 1 day
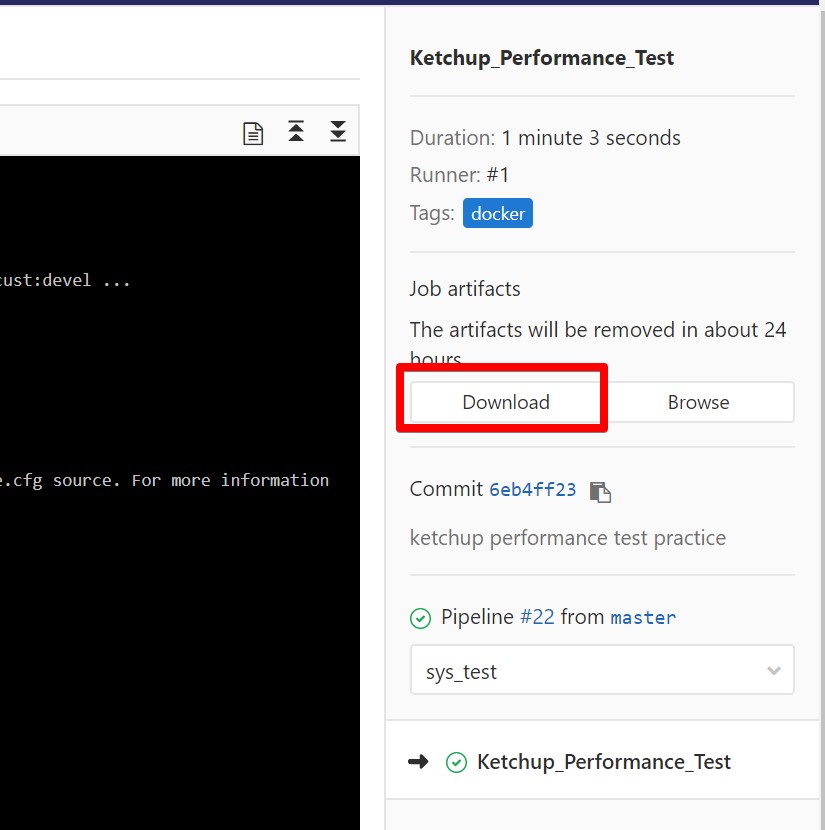
when: on_successテストの詳細の右側にある[Download]で後からでも結果をダウンロードできます。
システムテストのジョブをパイプラインに組み込む
先ほど実行したシステムテストをパイプラインに組み込みます。
.gitlab-ci.ymlの末尾に先程のシステムテストを追記していきます。
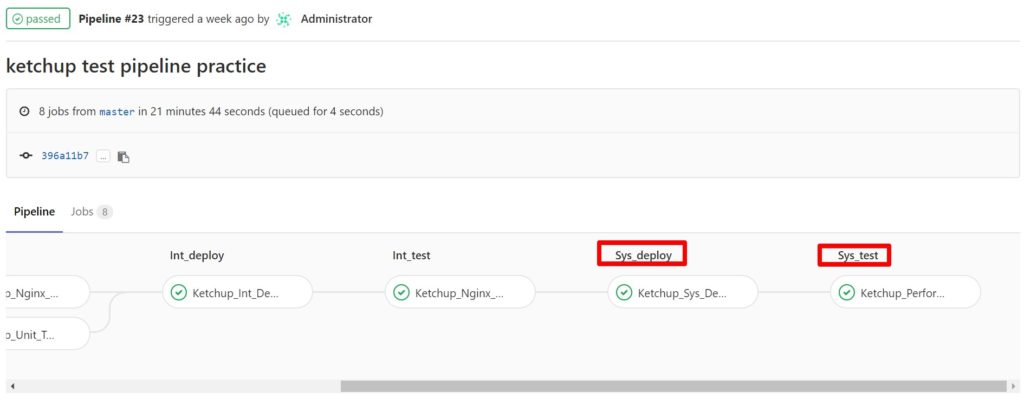
コード編集は省略して結果だけ載せます。システムテストが組み込まれて実施されていることを確認します。
9.2.5 パイプラインを分割する
ブランチの再設計
毎回変更がった都度、システムテストまで実施すると時間がかかって大変です。
Gitlab Flowの考え方に沿って新たに「staging」ブランチを作成し、このstagingブランチへの変更が実施されたタイミングでシステムテストを実施するように設定します。
一方で、devブランチやmasterブランチではシステムテストは実施されません。システムテストは1日1回などのタイミングで、masterブランチからstagingブランチへまとめて変更を反映することで実施していきます。
パイプライン分割の実装
ジョブに対して実行条件としてonlyを追加するだけです。
Ketchup_Sys_Deploy:
  stage: sys_deploy
(略)
  script:
    - ansible-playbook -i ./hosts/ketchup/test_inventory ./site.yml -vv
  only:
    - staging
  tags:
    - docker
Ketchup_Performance_Test:
  stage: sys_test
(略)
    - ansible-playbook -i ./hosts/ketchup/test_inventory ./cleanup.yml -vv
  only:
    - staging
  tags:
    - docker
システムテストを実施するために、stagingブランチを作成します。
[root@infraci ketchup-vagrant-ansible]# git checkout -b staging
[root@infraci ketchup-vagrant-ansible]# git branch
  master
* staging
[root@infraci ketchup-vagrant-ansible]# git push origin stagingstagingブランチは、あくまでリリースの最終確認専用のブランチです。
したがって、このブランチは直接変更をせずに、あくまでmasterブランチにある、特定バージョンのコミットのコピーであるようにしておきます。
このブランチの運用ルールをもとに、第8章でお伝えしたマージリクエストによって定期的にmasterブランチの更新をstagingブランチへと反映します。マージリクエストがマージされたタイミングで機械的にシステムテストが実施されます。
マージリクエストを利用せずとも、コマンドラインから実施することも可能です。この場合、stagingブランチに対して、masterブランチの更新を反映しシステムテストを実施します。ただし、次のコマンドを実行する場合には、masterブランチ側で何かしらのファイルの更新が行われていることが前提となります。
[root@infraci ketchup-vagrant-ansible]# git checkout staging
[root@infraci ketchup-vagrant-ansible]# git fetch
[root@infraci ketchup-vagrant-ansible]# git merge origin/master
[root@infraci ketchup-vagrant-ansible]# git push origin staging
9章の前半ですが、かなりボリュームのある内容でした。きちんと理解できてない部分もあるので後で見返しが必要ですね。
今回は以上となります。

コメント